
Get your [email protected] Email Address with Free Email Service
- Chapi Menge
- Misc
- May 5, 2024
Hey My people! Do you have your own domain name and want to have an email address like [email protected] to receive and send email with it? In this post, I’ll show you how to get a free email address with your domain name using Cloudflare, Resend and Gmail Service.
Table of Contents
Get your Domain if you don’t have one
I am sure most developers have their own domain name but if you don’t have one, you can get one from Cloudflare or Namecheap or any other domain registrar.
I have my domain name inside Cloudflare with makes it easy to manage my domain and cloudflare generously free developer services like Worker, Pages, D1, KV and many more you can check out here .
How does it work?
After you got your domain name, you can manage email addresses with DNS records mostly known as MX records. MX records are used to route emails to mail servers.[You don’t need to know how it works, But incase you want to know more, you can check out this link .
So once we are in control of our domain DNS records, the first thing we want is to receive emails under our domain name. We can use cloudflare service called Email Routing and forward to your personal email address.
This means whenever somebody send you an email to [email protected], it will be forwarded to your personal email address like [email protected]. I know you might ask me how about sending email with my domain name? Don’t worry, I will show you how to do that with Gmail Service and Resend Service.
Set up Email Routing (Receive Email with your Domain Name)
Go to your Cloudflare dashboard and search for Email Routing using Go to search bar. For some reason, you might not see it in the dashboard, but you can access it directly adding https://dash.cloudflare.com/${account-id}/${your-domain}/email/routing/overview
Click Add Destination addresses and add your personal email address and verify it by clicking the link sent to your email address.
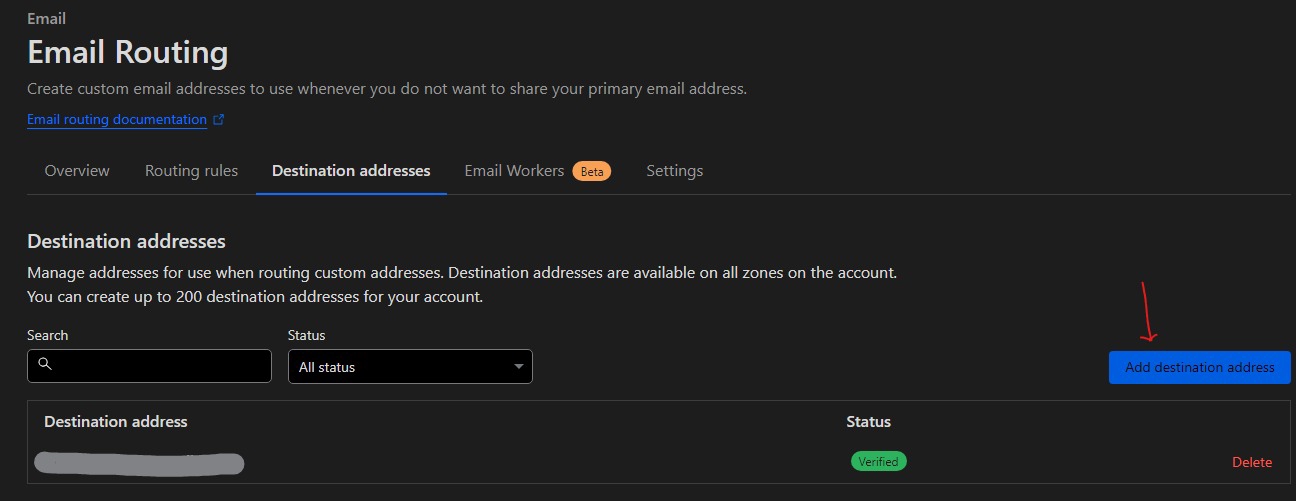
- Click
Routing Rules, then there is two option here Catch-all and Specific Address. Catch-all means all emails sent to your domain will be forwarded to your personal email address. Specific Address means you can specify which email address to forward to your personal email address.Catch-all: people can send to *@yor-domain.com and it will be forwarded to your personal email address. This is [MY RECOMMENDATION] since you can just give an email address related to the topic you are discussing. For example if a person from github want to contact you, you can give them [email protected] and it will be forwarded to your personal email address.
Specific Address: You can specify which email address to forward to your personal email address. For example, you can specify [email protected] to be forwarded to your personal email address.
Depends on your choice, you can choose one of them or both.
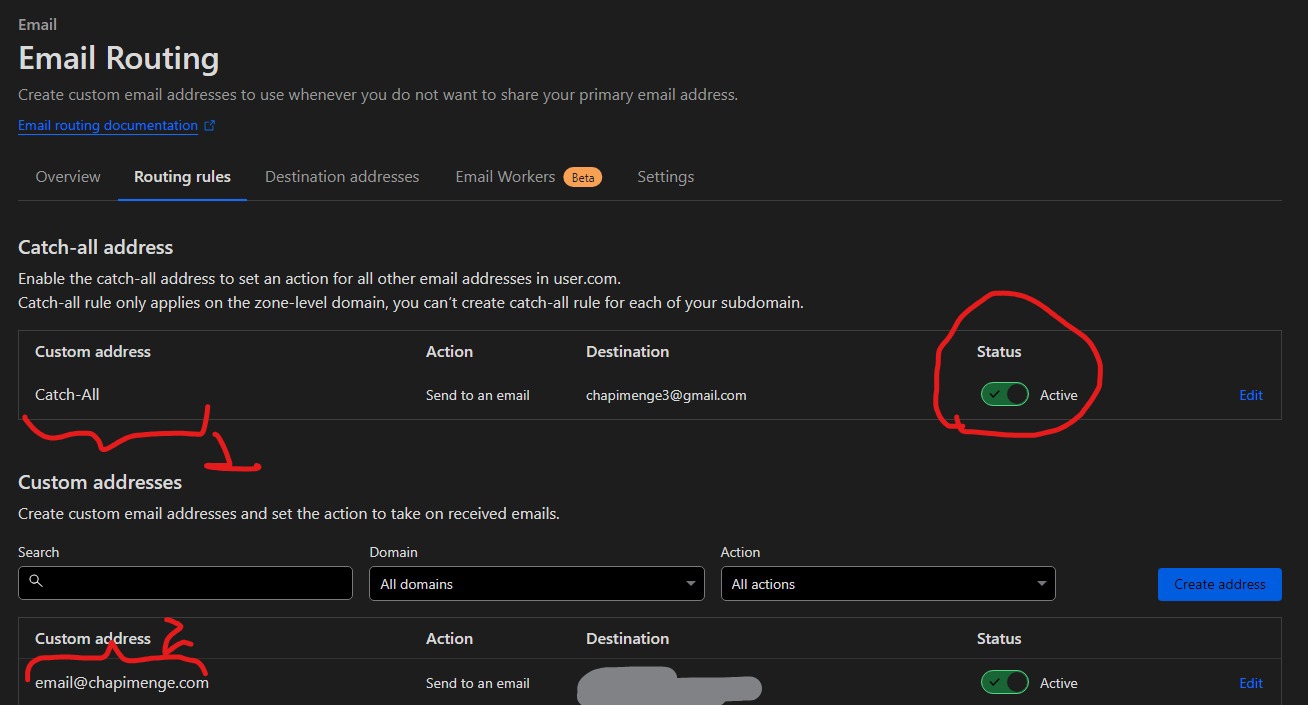
- Click Save and you are done with Email Routing.
Now Half of the work is done, you can now receive emails under your domain name and you can ignore the rest and reply from your personal email address. But if you want to send email with your domain name, you can follow the next steps.
At this point, you can test by sending an email to your custom email you added above if you add catch all just use [email protected] and you will receive the email in your personal email address.
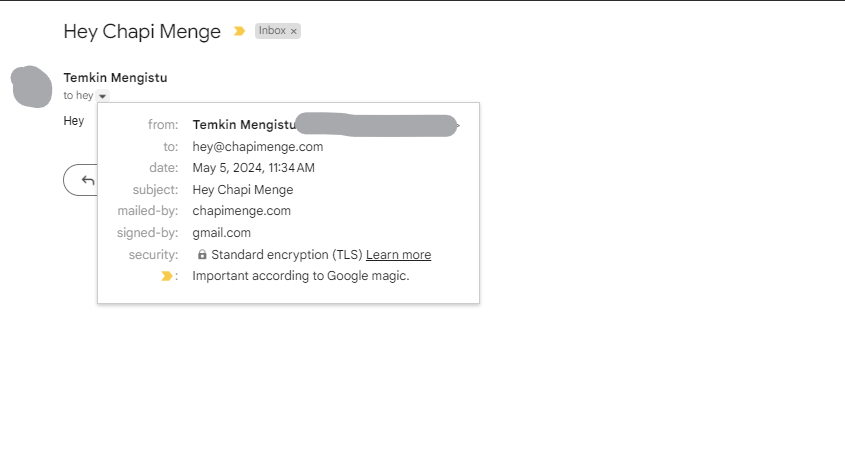
Send Email with your Domain Name
To send email with your domain name, we need to use SMTP service. SMTP stands for Simple Mail Transfer Protocol. It’s a set of rules that allow you to send emails. Gmail is amazing enough to let you add more email address to send email from it. So without further ado, let’s get started.
Signup for Resend and verify your email address. Resend is not free all the time, but they offer free plan for 3000 emails per month and 100 emails per day limit. Am sure you are not important person to send more than 100 emails per day 😂.
Once you signup Go to Domain Section and click Add Domain. Add your domain name. Then it will ask you to add DNS records to your domain. Go to your Cloudflare dashboard and add the DNS records or your domain registrar dashboard, then manage DNS records.
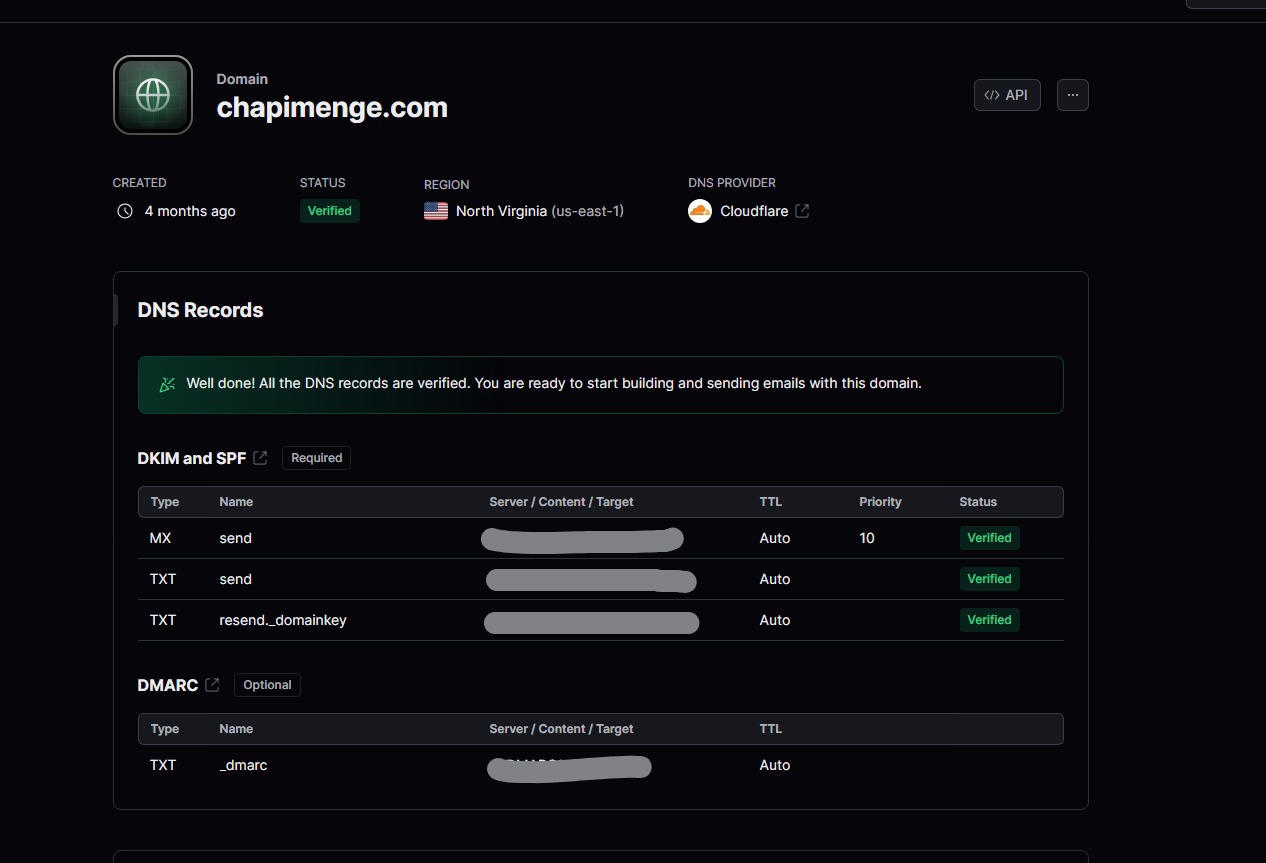
- Once you add the DNS records, click Verify and you are done with Resend setup and you will see the status Verified like below.

- Now we need to Generate an API key in Resend and copy SMPT details. Go to Settings and click API Keys and click Generate API Key. Copy the API key it won’t be possible to see it again so make sure to save it in safe place.

Once you generate the API Key, Now you can go to Settings > SMTP and copy the SMTP details from there but it is common so i will put the details here.
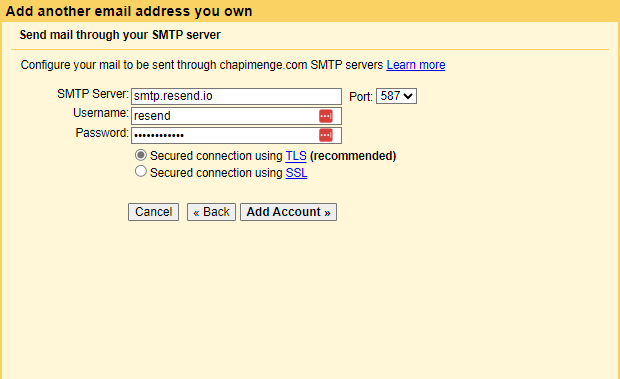
host: smtp.resend.io
port: 587
username: resend
password: your-api-key
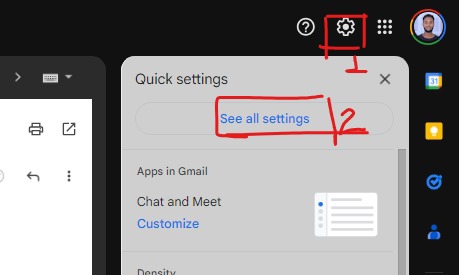
Now go to Gmail and click Settings Icon Next to your profile and click See all settings.
Then Go to Accounts and Imports Tab and click Add another email address under the Send main as: section.
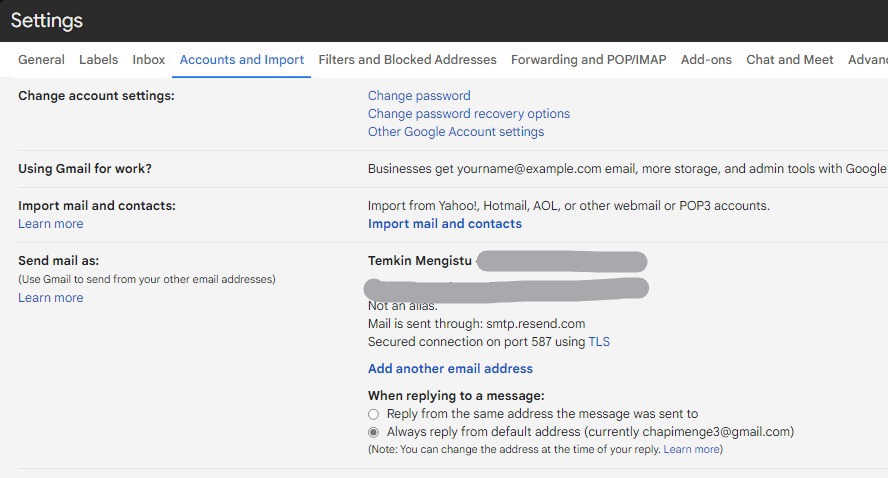
Now one thing to notice here is we can’t make the email address to be any name like we did in the Email Routing. So you can add any email address you want to send email from. For example, you can add [email protected] or whatever email that you want to reply with.
Info
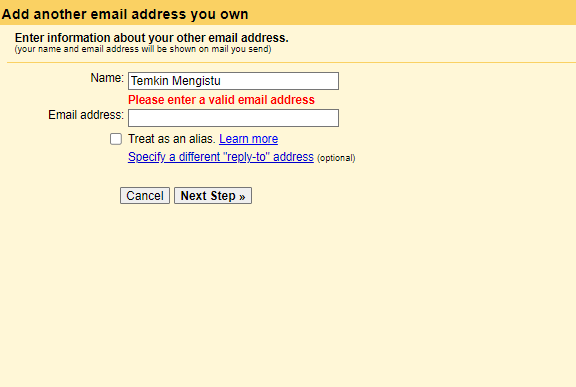
Turn off the option Treat as an alias.
Enter the any email address you would like to send from, You can name any name as you like.
Now put the SMTP details we copied from Resend and click Add Account.
Info
Make sure to copy and paste the token you generated in the API Key in password field.
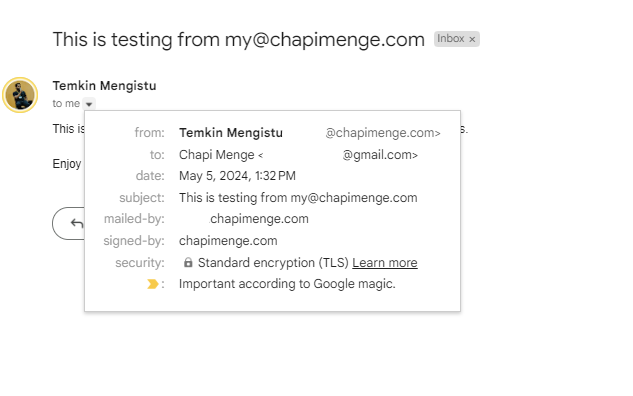
Now let’s test it and check if the email send from different email address and also you can check form Resend dashboard.
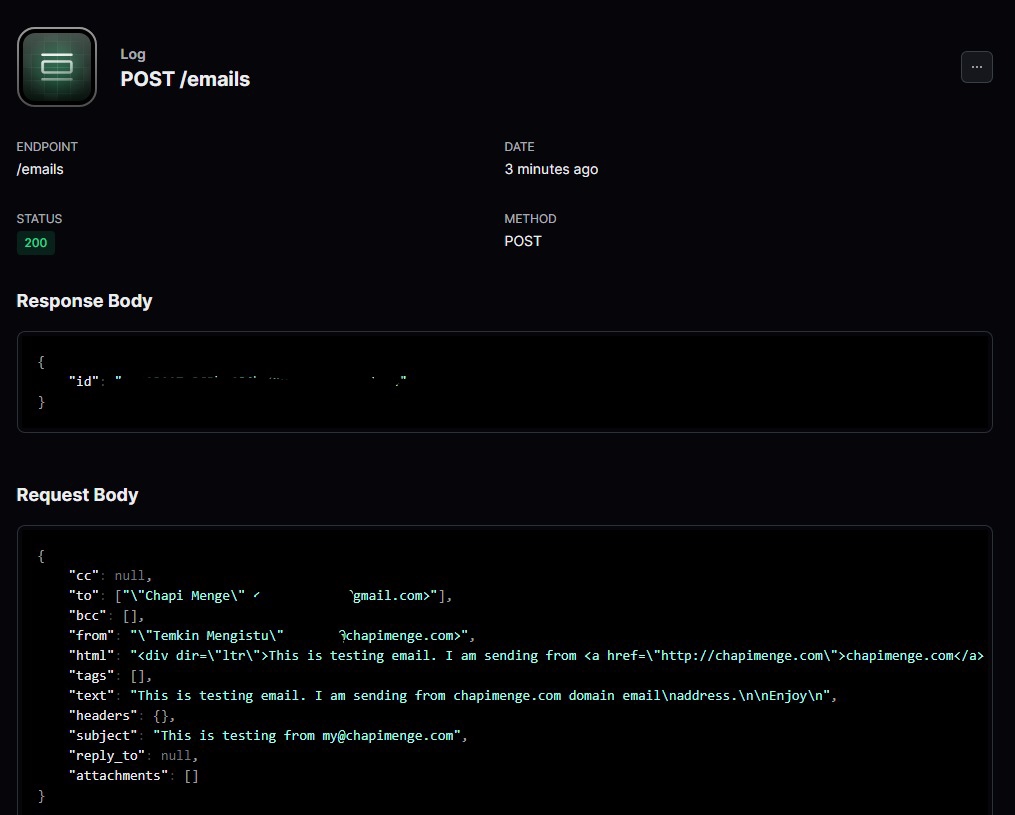
Go to Resend > Logs and check the logs and see the details.
That’s it! You have successfully set up your domain email address to receive and send email with it. If you have any questions, feel free to ask in the comments.


